
FIVE THINGS YOU NEED TO KNOW BEFORE STARTING CALLIGRAPHY
- Start Simple, Learn Faux Calligraphy, Study The Letter Forms, Get The Right Tools & Practice Calligraphy Drills
- All pen holders, brush pens, nibs, and inks are not the same. Each serves a specific purpose. You will save yourself a lot of frustration, time, and money by getting the right tools.
- This might be the best piece of calligraphy advice for every beginner. I wish there were a more natural way to get better at calligraphy, but there is not. There is no one magic tool to become a better calligrapher. The magic is in practice!
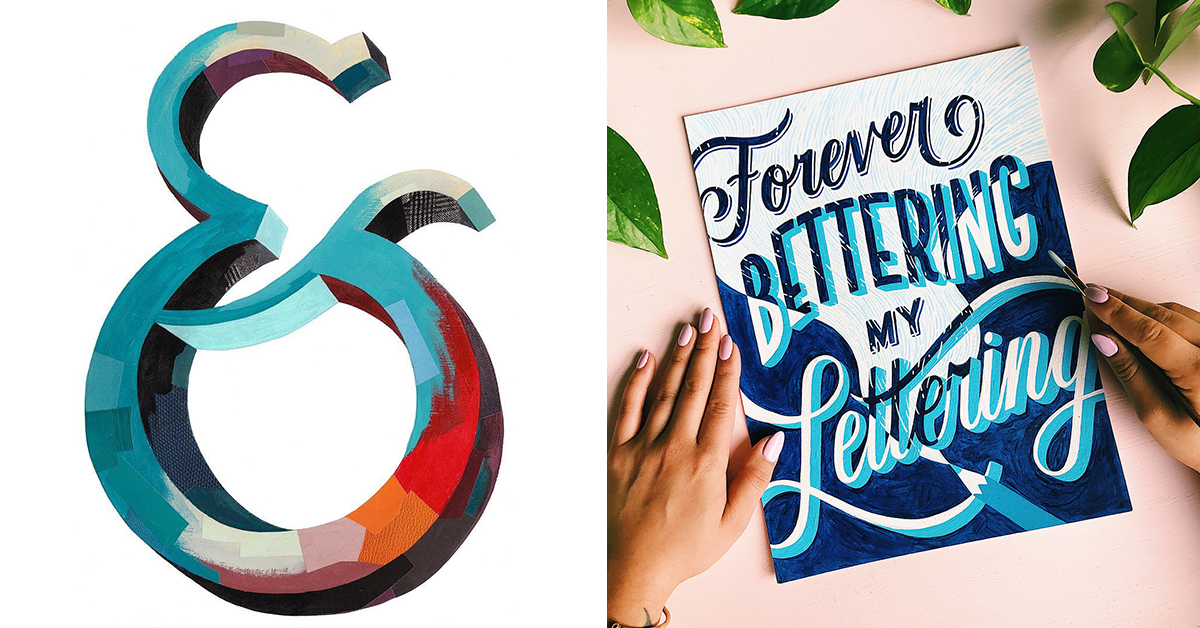
- DON’T COMPARE YOURSELF TO OTHERS.
- GIVE YOURSELF GRACE! Last, but not least, this piece of calligraphy advice for beginners is one we all need, no matter how long we’ve been doing this art!
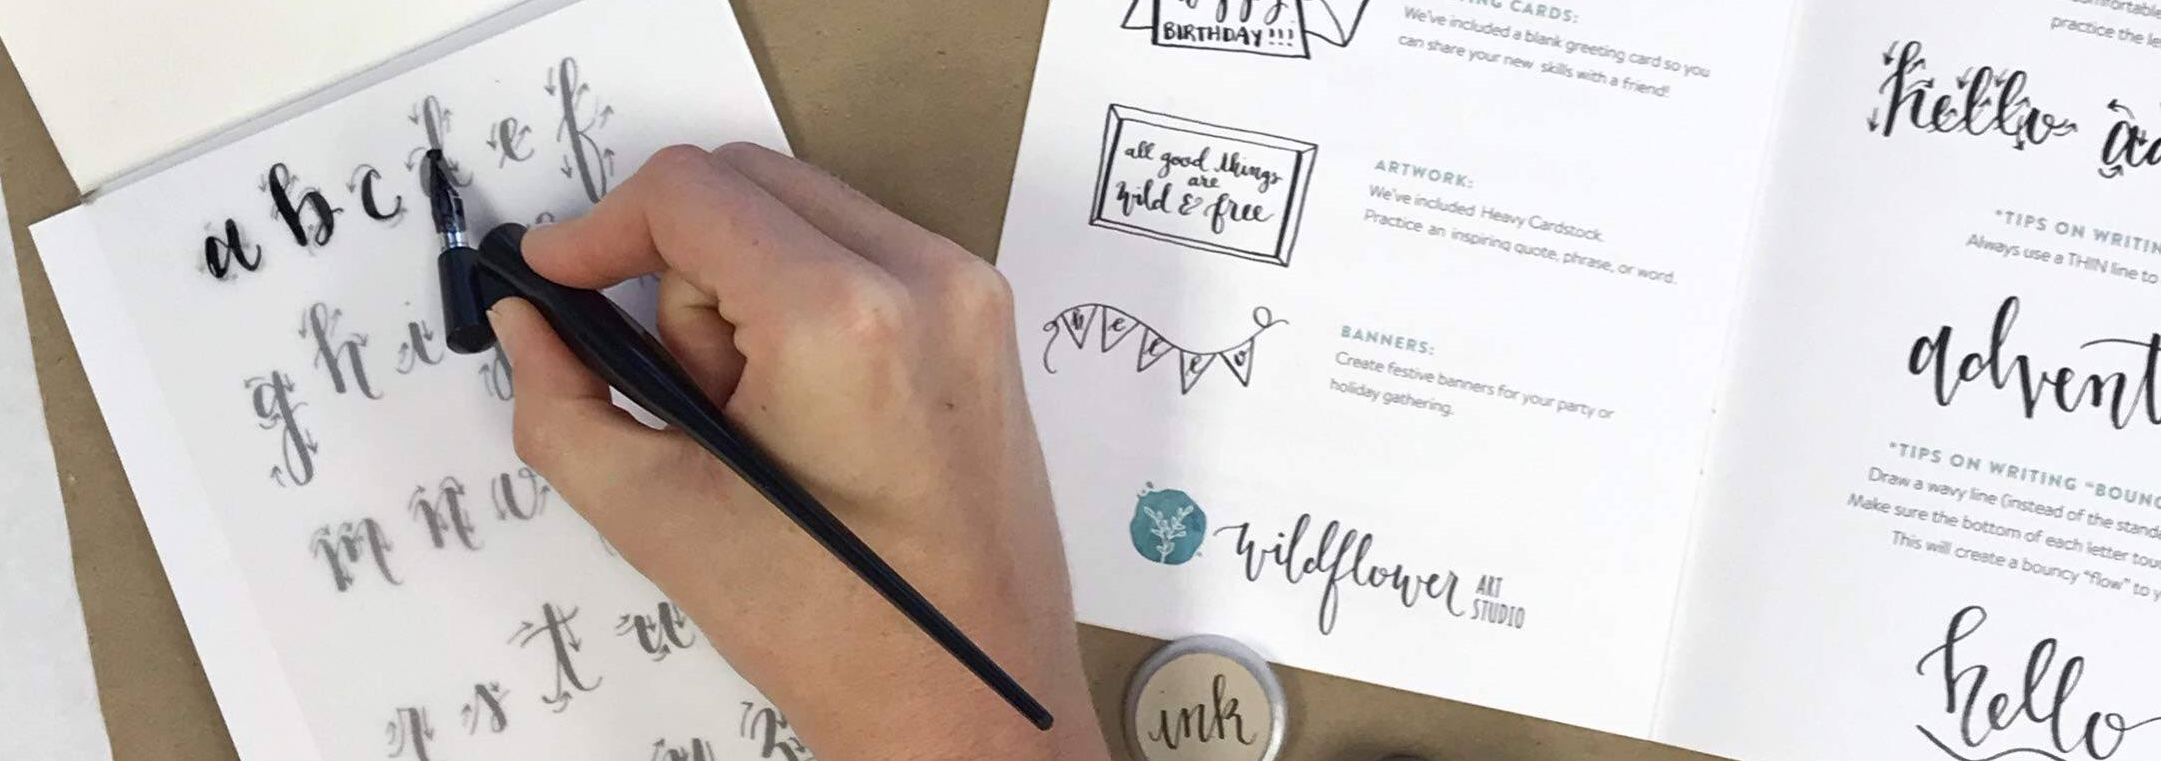
HOW TO HOLD A BRUSH PEN ?
First things first let’s just quickly cover this part because i often see beginners struggling with how to hold a brush correctly.
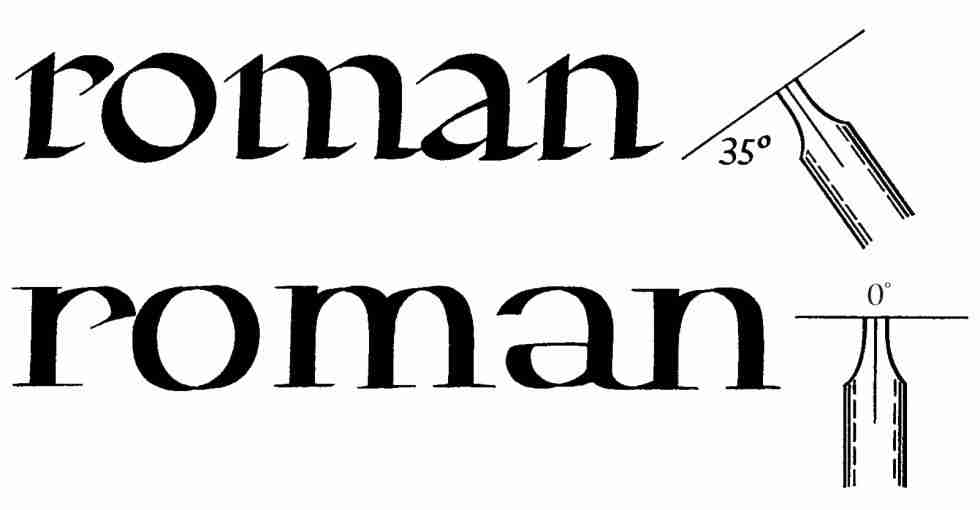
Different people like to hold the pen in different ways but the most important thing is the angle on which you to hold it.
Check out the reference image on right –>
Holding the pen too upright will not give you the desired effect (thick and thin contrast) and it will also damage the tip of your pen.
That been said, the next important part is to know where to apply thin strokes and where to apply the thick strokes. (if you already know this feel free to skip to the next section).
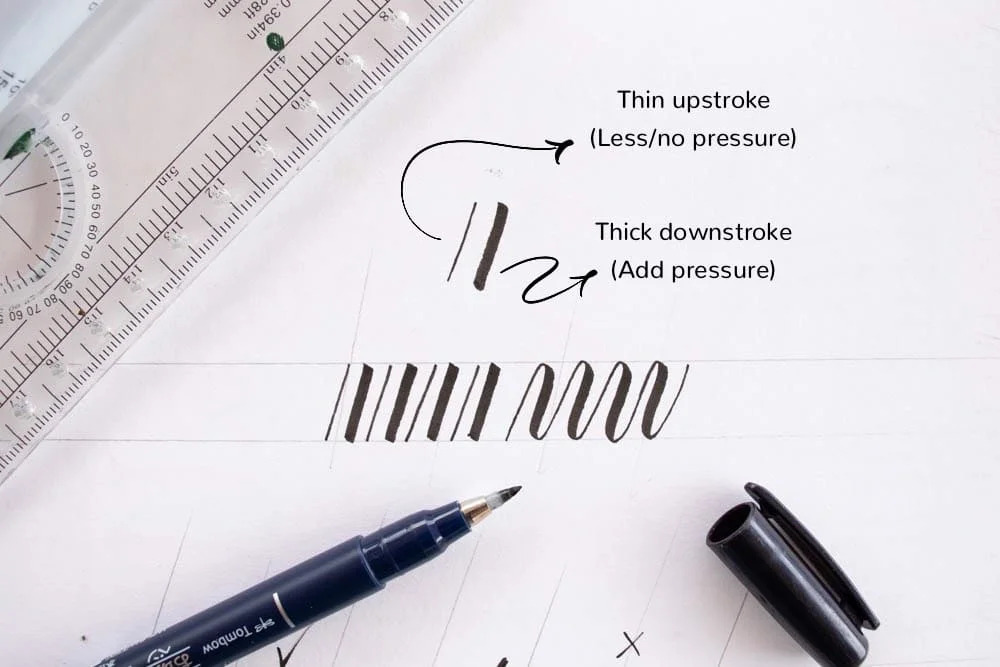
THE GENERAL RULE IS THAT YOUR STROKES GOING UP ARE THIN WHILE THE ONES GOING DOWN ARE THICK.
The thick down strokes are created by applying pressure while the up strokes are done with the tip of the pen – without applying any pressure.
If you are a complete beginner it is essential that you first get familiar with the brush pen and how to use it.
Before even thinking to start writing letters and words, try to get comfortable creating thin lines when going up and thick lines when going down.
This will help you to get to know the tool and you will start developing a feeling for it in your hand –
In calligraphy, you need to start with the very, very basics. These are referred to as ‘strokes’. All of your letters are made up of strokes. So, practice the strokes- over, and over, and over again- until they’re consistent. The more consistent your strokes, the more consistent your letters!
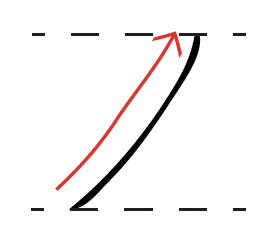
1. Up Stroke
With the upstroke you want to start the bottom and extend upwards with a slight curve towards the waist. You will want to go slow and try your best to stay at a consistent speed.
Pro Tip: Don’t “Flick”.
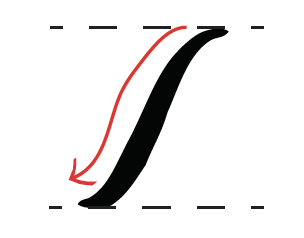
2. Down Stroke
With the downstroke you will be working opposite to the upstroke. You will want to start at the top and extend downwards starting with medium pressure and gradually adding more as you get to the bottom. Make sure as you approach the bottom you ease off the pressure.
Again you will want to go slow and stay at a consistent speed.
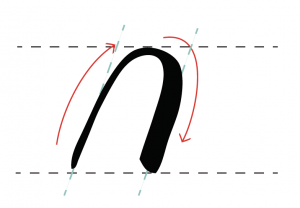
3. Over turn
With this stroke you will want to start at the bottom applying light pressure for your upstroke and then curving over into a thick downstroke. You want to make sure your two lines stay parallel and that all strokes stay on the same plane./p>
Pro Tip: No Flick or tail at the bottom you want to end it straight.
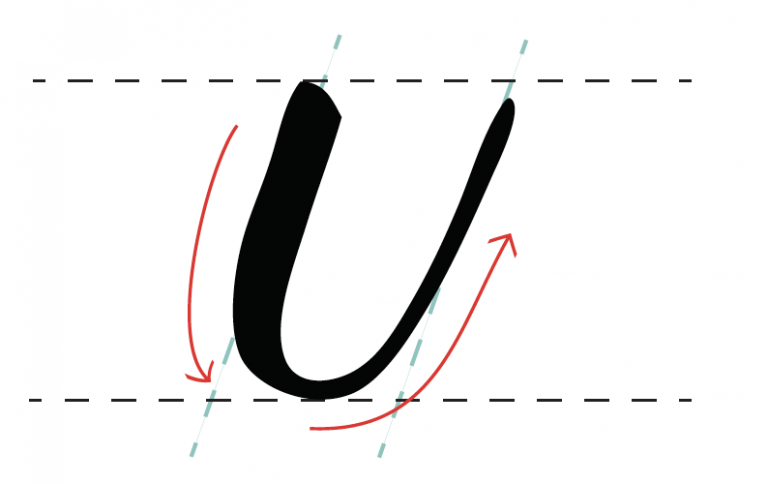
4. Underturn
Starting at the top moving downwards you want to apply a heavy pressure going into a light upstroke.
You again want to make sure that your two lines stay parallel and make sure to let off the pressure early.
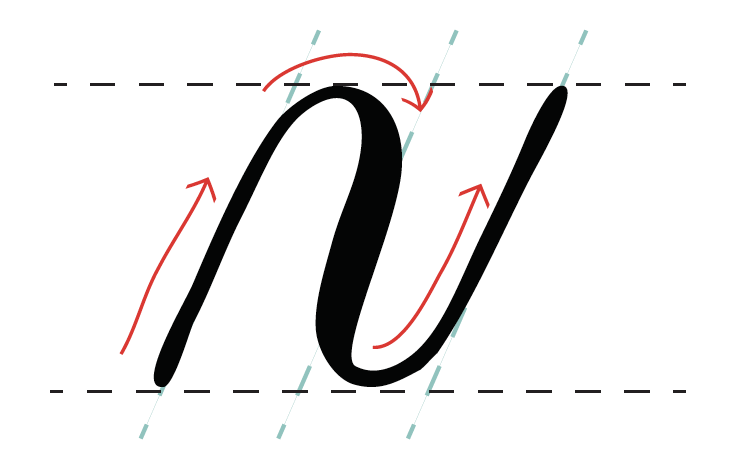
5. Compound Curve
With the upstroke you want to start the bottom and extend upwards with a slight curve towards the waist.
You will want to go slow and try your best to stay at a consistent speed.
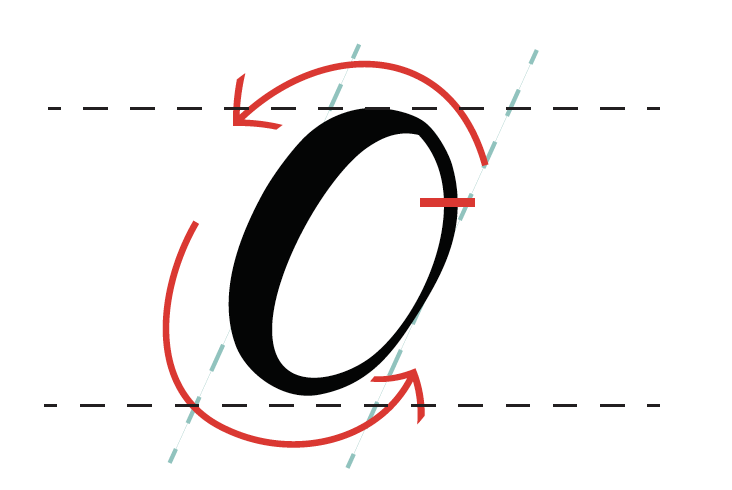
6. Oval
One of the most important things to remember with this stroke is that you want to start off on the side. Most tend to start at the top and this creates a gap where the lines end up meeting. This one starts with an upstroke light pressure and as you transition at the top into heavy pressure downstroke, then another transition at the bottom back into a light pressure upstroke.
Pro tips: Try not to make the top and bottom pointed
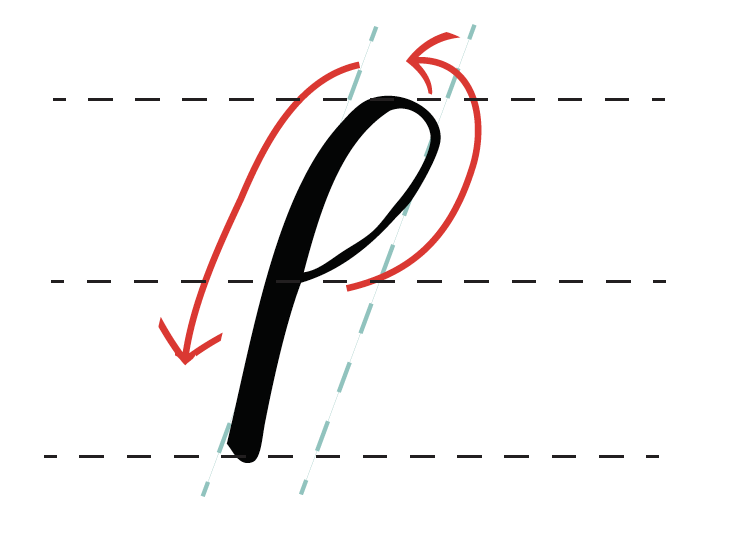
7. Ascending Loop
With this stoke you start in the middle with a light upstroke and adding pressure as you come back down. You will transition at the top and curve down into a heavy downstroke.
Make sure everything is at the same angle and that you don’t end up with a tail where the loop extends through.
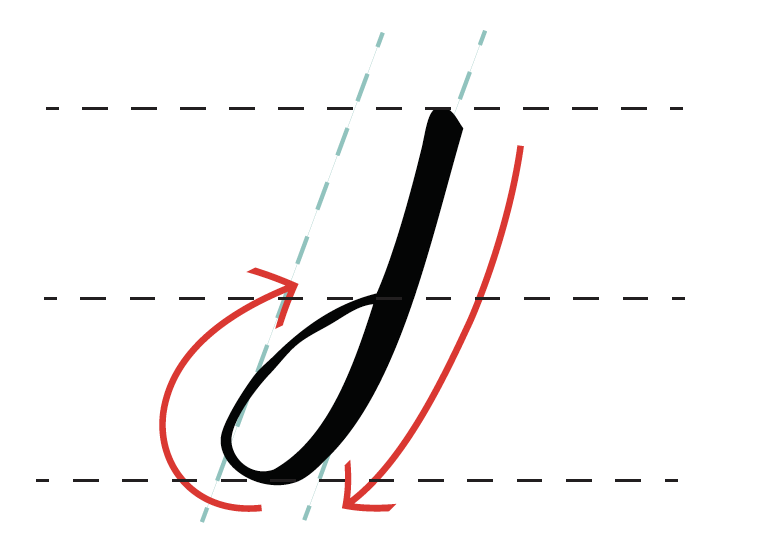
8. Descending Loop
For this final stroke you will be starting with a heavy downstroke applying pressure until you come back up with light upstroke.
Similar to the ascending loop you want to make sure you maintain a steady speed and don’t end up with the loop extending through creating a tail.